To create a flyer using AI, write down what you're promoting, describe it to an AI flyer generator with the exact wording you want on the page, pick a size for where the flyer will be seen, generate a few versions, and proofread the one you like before you share or print it. The AI handles the layout, imagery and typography in about a minute. Your job is the part it can't do: deciding what the flyer needs to say and checking that it says it correctly.
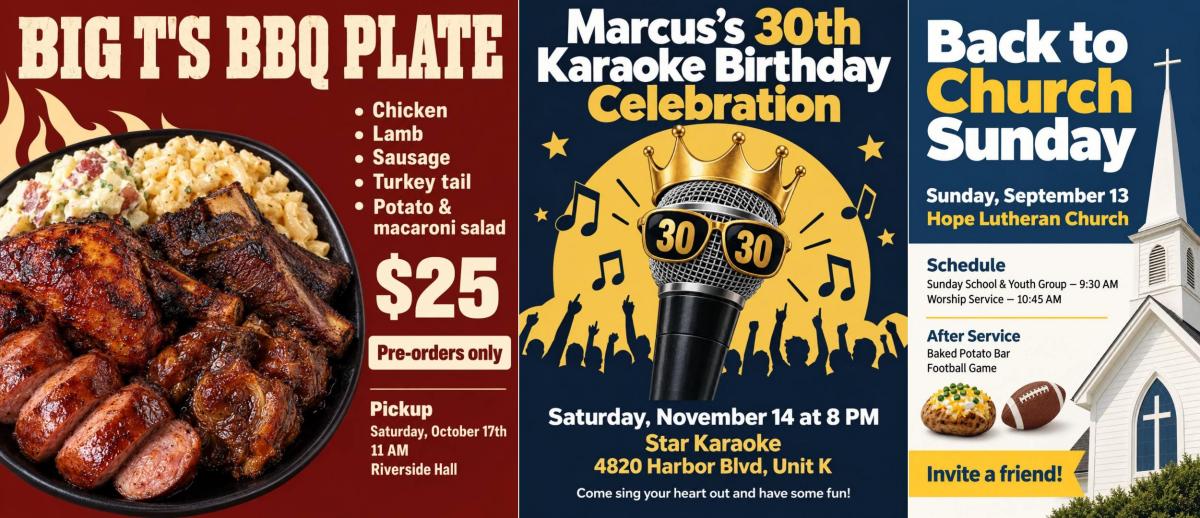
This guide walks through each step with real examples made in AI Flyer Studio, including a side-by-side look at what a vague prompt produces compared with a specific one, and a checklist for catching the problems AI flyers are known for: misspelled details, blurry prints and the generic "AI look". (Names, dates and phone numbers in the examples are made up.)
What Is an AI Flyer Generator?
An AI flyer generator turns a plain-language description into a finished flyer design. You type something like "Mobile pet grooming, we come to you, call 555-0148" and get back a complete layout: headline, supporting text, imagery, colors and composition, all in one image.
It works differently from the two kinds of tools most people try first:
| AI flyer generator | Template editor | General AI image tool | |
|---|---|---|---|
| Examples | AI Flyer Studio | Canva, Adobe Express | ChatGPT, Gemini |
| You start with | A description of your event or offer | A pre-made template | A chat prompt |
| The design comes from | AI, built around your content | A template designer | AI |
| Flyer and print sizes | Built in | Built in | You set them up yourself |
| Changing text | Describe the change | Click and retype | Describe the change |
| What you get | A finished image | Editable layers | A finished image |
Template editors are great when you want control over every element. General image tools are flexible but leave the flyer-specific work to you. An AI flyer generator sits in between: you bring the content, it brings the design.
The trade-off to know about: in an AI flyer, the text is part of the picture rather than a separate text box. That's why the result looks designed instead of filled in, and it's also why you can't click on a word and retype it. Steps 2 and 5 below are mostly about getting the text right and fixing it when it isn't.
Step 1: Define Your Goal and Audience
Before you open any tool, answer three questions. It takes two minutes and shapes everything after.
What should someone do after reading it? Call, show up, pre-order, sign up, visit. Pick one. A flyer with one clear action works better than one that tries to promote everything you offer.
Who will see it, and where? A flyer on a laundromat bulletin board is read from a few feet away by someone walking past. An Instagram post is a small image on a phone. Where it will be seen decides the size (Step 3) and how much text it can carry.
What are the facts? Write them out exactly as they should appear. This short brief becomes your prompt:
Headline:     [5 to 8 words, the one thing to know]
What:         [event, sale, service or offer]
When:         [day, date, time]
Where:        [address, or "online"]
Price/offer:  [if any]
Action:       [Call / RSVP / Pre-order / Visit, and how]
Contact:      [phone, website or social handle]
Must use:     [logo, product photo, venue photo]
Feel:         [2 or 3 words: warm, bold, elegant]
Then cut. A common rule of thumb is that a flyer has about three seconds to make its point, and every extra line competes with your headline. Fewer words also means fewer chances for a text error. If a detail doesn't help someone take the action, put it on your website instead.
Step 2: Write a Clear Prompt
Here is the same flyer generated twice, in the same tool, at the same 1:1 size. The only difference is the prompt.
Vague prompt:
Make a flyer for my BBQ plate sale.
Specific prompt:
BIG T'S BBQ PLATE. Chicken, lamb, sausage, turkey tail, potato & macaroni salad. $25. Pre-orders only. Saturday, October 17th. Ready for pick up at 11 AM at Riverside Hall.
| Vague prompt | Specific prompt |
|---|---|
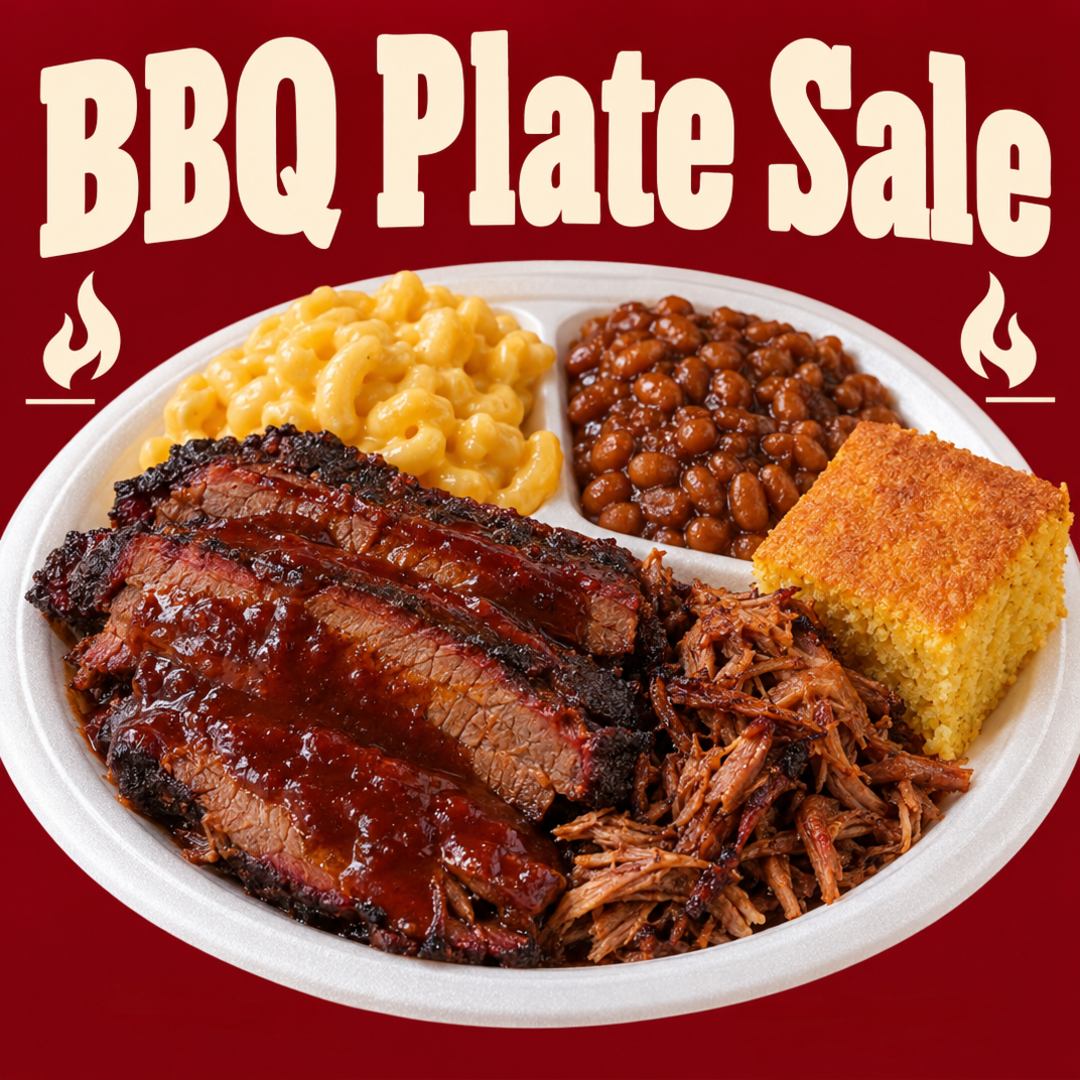 | 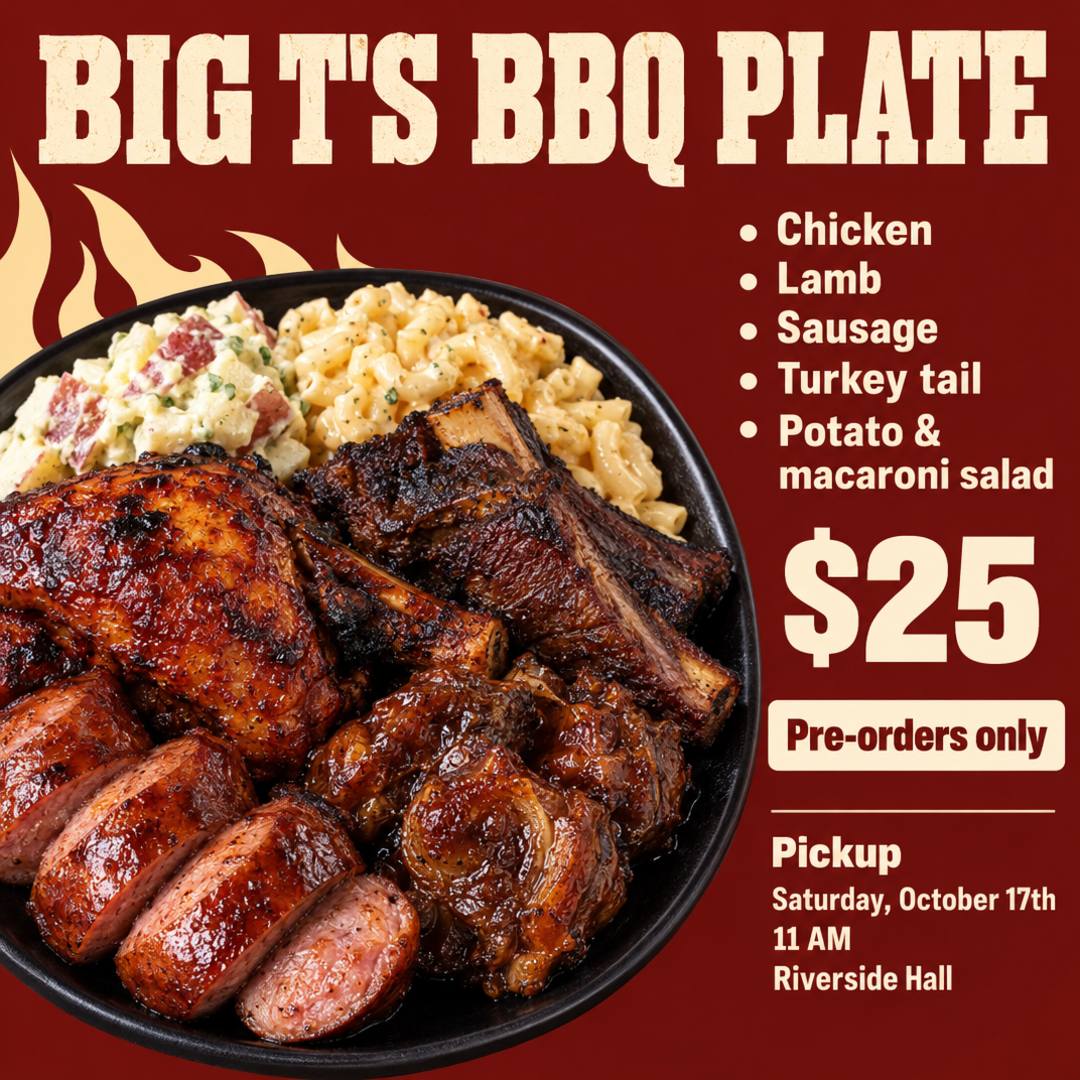 |
Both look like flyers. Only one can sell a plate. The vague version has no price, no date and no pickup location, because the AI has no way of knowing them. AI Flyer Studio is built not to make up details you didn't provide. Some tools fill the gaps with placeholder text instead, which is easy to miss and worse to print.
Notice that the specific prompt isn't clever. It's just the facts, in the order a reader should see them. A simple formula that works:
[Headline]. [What it is, in one sentence]. [Date, time, place, price]. [Call to action and contact]. [Style: mood, colors, what to avoid]. [What to do with any photo or logo you upload].
A few habits help the text come out right:
- Write the exact words you want printed. If the wording matters, put it in quotes, for example: headline "Grand Opening Weekend".
- Keep the headline short. Short headlines come out right far more often than long paragraphs and fine print.
- List details in reading order, top to bottom, the way you want someone to read them.
- Describe the lettering, not the font name. "Bold condensed headline" or "handwritten script" works. Specific font names usually aren't followed.
- Describe the look in concrete terms. "Cream background, navy and mustard, lots of white space, vintage diner sign style" gives the AI far more to work with than "modern and eye-catching".
You don't have to tidy up your text first. In AI Flyer Studio, you can paste a whole announcement, menu or event program as it is. It sorts the content into a headline, key details and contact info, and keeps names, dates, prices and phone numbers exactly as you wrote them. It works in other languages too: write in Spanish and you get a Spanish flyer.
Add your own images. Upload your logo, a product photo, a picture of your venue or an older flyer you want to match, and say what each one is for ("Put our logo at the top", "Use my photo of the costume rack"). The generator works out whether each image is a logo, a product, a person or a style reference. Real photos of your actual business are one of the best ways to make a flyer feel less generic. You can see this on our Halloween flyer maker page, where a photo of a costume rack becomes a rental flyer. The AI may redraw fine details, so if your logo has to be exact, add it on top after generating (see Step 5).
Step 3: Choose the Right Size for Social or Print
Pick the size before you generate, not after. The AI arranges the layout for the shape you choose, so cropping a square flyer into a tall one later usually cuts off text.
| Where it will be seen | Size to pick |
|---|---|
| Instagram or Facebook feed | 4:5 (1080 × 1350 px) |
| Stories, Reels, WhatsApp status | 9:16 (1080 × 1920 px) |
| Square posts, group chats | 1:1 (1080 × 1080 px) |
| Link previews, event headers, email | 1.91:1 (1200 × 630 px) |
| 2:3 (1000 × 1500 px) | |
| Bulletin boards, door-to-door (US) | US Letter, 8.5 × 11 in |
| Handouts and inserts (US) | Half Letter, 5.5 × 8.5 in |
| Bulletin boards (outside the US) | A4, 210 × 297 mm |
| Handouts and counter flyers | A5 or A6 |
| Postcards and mailers | 4 × 6 in |
For anything else, like a door hanger or a website banner, enter a custom width and height.
For print, three things matter:
- 300 DPI. This is the standard resolution for sharp printing. A small social image can't simply be converted to 300 DPI: stretching it adds pixels but not detail, and the print comes out soft. Start at print size.
- Bleed. Printers trim the paper after printing. Bleed is extra background that extends 0.125 in (3 mm) past the trim line, so you don't end up with thin white edges.
- Safe area. Keep text and logos well inside the trim line so nothing gets cut off.
AI Flyer Studio's print sizes (A4, A5, A6, US Letter, Half Letter and 4 × 6) are set up at 300 DPI with bleed included, so the file is ready for a print shop. Before you order a big run, print one copy or ask the shop for a proof and check that the small text is crisp.
Need both a social version and a print version? Generate each one at its own size. Each gets a layout made for its shape.
Step 4: Generate and Compare Variations
Generate two to four versions at once instead of one (AI Flyer Studio lets you pick 1 to 4 per run). The same prompt can come out quite differently each time, with a different layout, color scheme or image. Looking at them side by side is the fastest way to find out what you actually like.
To pick a winner, run each version through these quick tests:
- The thumbnail test. Shrink it to about two inches tall, or look at it on your phone at arm's length. Can you still read the headline and tell what to do?
- The squint test. Squint at it. The thing that stands out should be your headline or main image, not a decorative swirl.
- The stranger test. Show it to someone for three seconds and ask what it's for. If they can't tell you, the message isn't clear yet.
If none of the versions work, change one thing in your prompt and try again: a different color direction, "more white space", "photo-led layout" or a style reference image. Changing one thing at a time shows you what made the difference. Rewriting the whole prompt starts over from scratch, including the parts you liked.
Step 5: Proofread Text, Layout, and Visuals
This is the step people skip, and it's where most AI flyer problems get caught. Current image models get short headlines right most of the time. The errors that still slip through tend to be in the details that matter most: dates, times, phone numbers, addresses and small print. Open the flyer at full size and check it against your brief, character by character.
Text
- Every name is spelled correctly
- The date matches the day of the week (check a calendar)
- Times include AM or PM
- The phone number is right, read digit by digit
- The address, price, website and social handle are right
- No repeated words or extra lines you didn't ask for
- No garbled "fake text" hiding in the background
Layout
- The headline is the first thing you see
- The call to action is easy to find
- For print: text isn't crowding the edges
Visuals
- Faces, hands and objects look natural
- Your logo looks right
- There's no AI-drawn QR code (these almost never scan)
Check for what's missing, too, not just what's wrong. Look back at the BBQ flyer in Step 2: it says "Pre-orders only" but never says how to pre-order. There's no phone number because the prompt didn't include one. The AI only works with what you give it, so this is the one check no tool can do for you.
How to fix a mistake. Because the text is part of the image, you fix it by asking for a change. In AI Flyer Studio, use the flyer as a reference image (you can pick it from your History without re-uploading) and describe the change in one sentence:
Change the date to September 20 and the worship service to 10:30 AM. Keep everything else the same.
| Before | After |
|---|---|
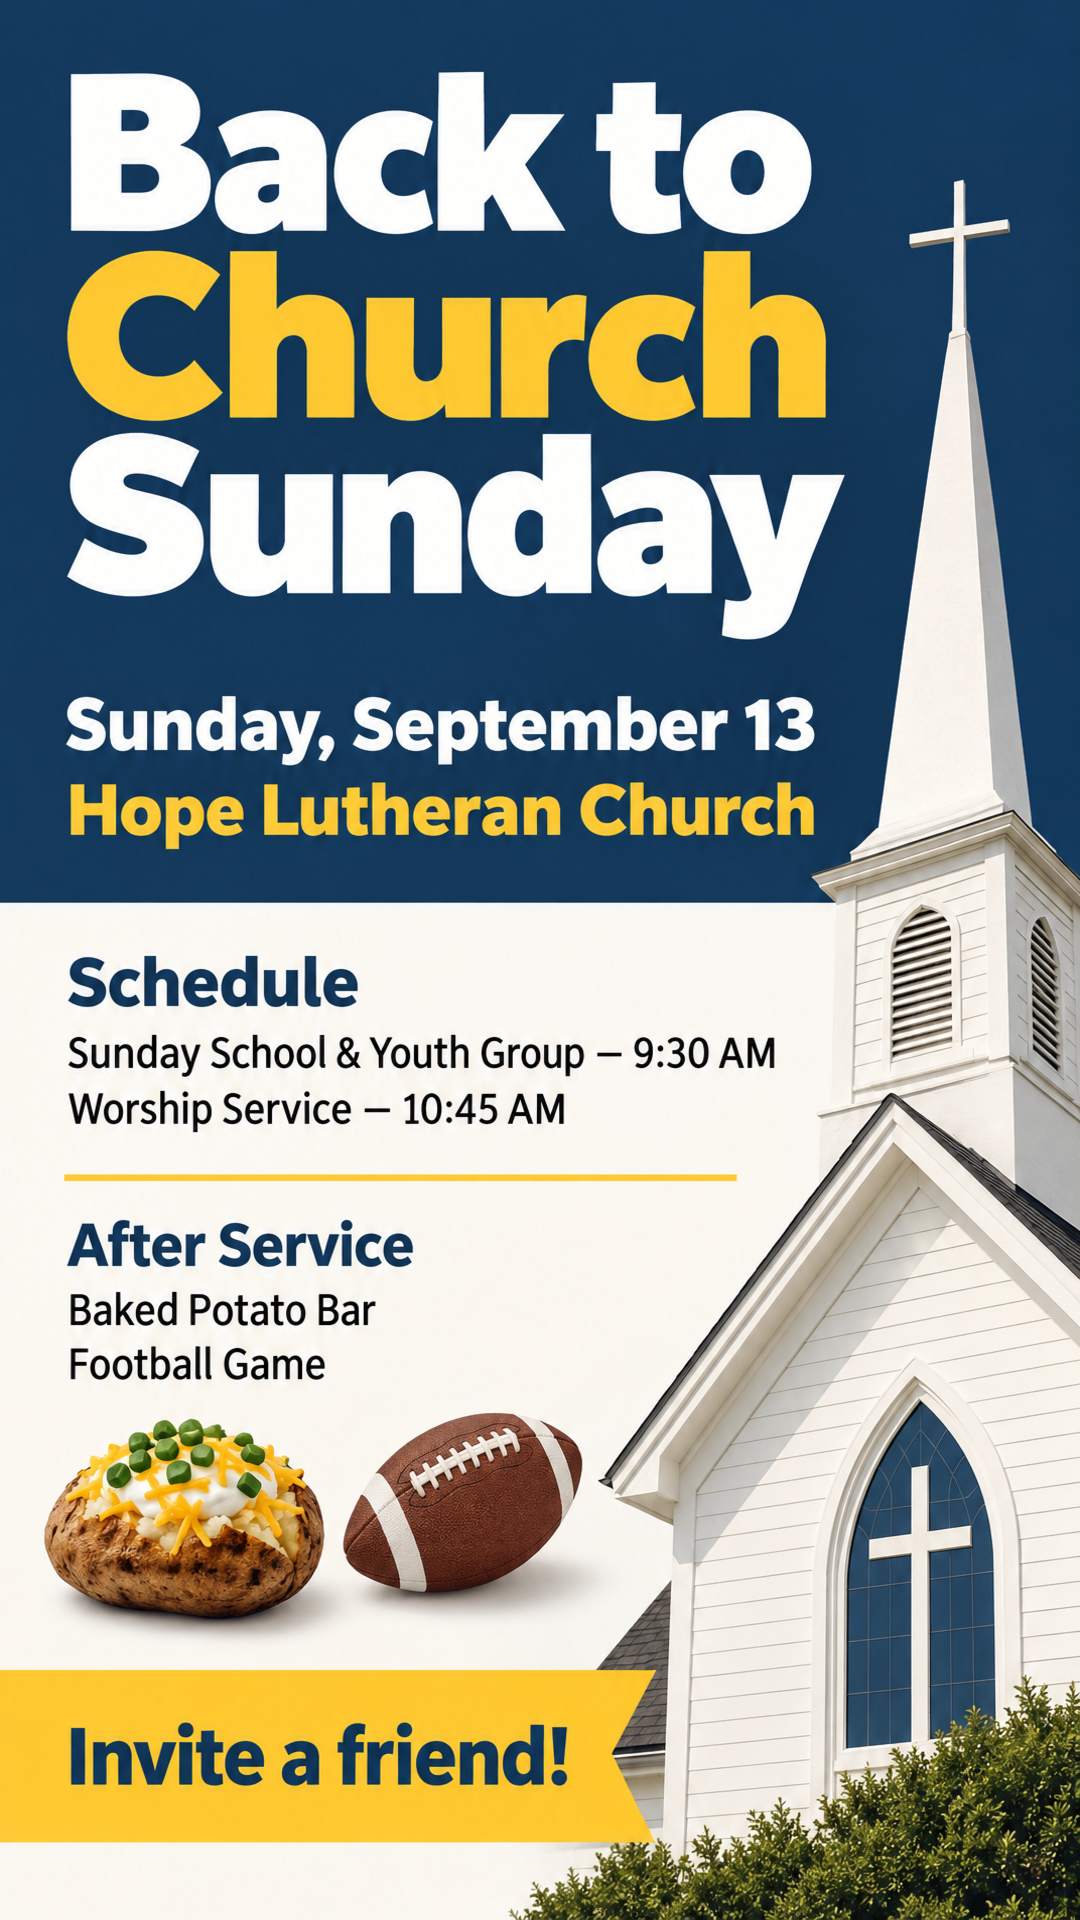 | 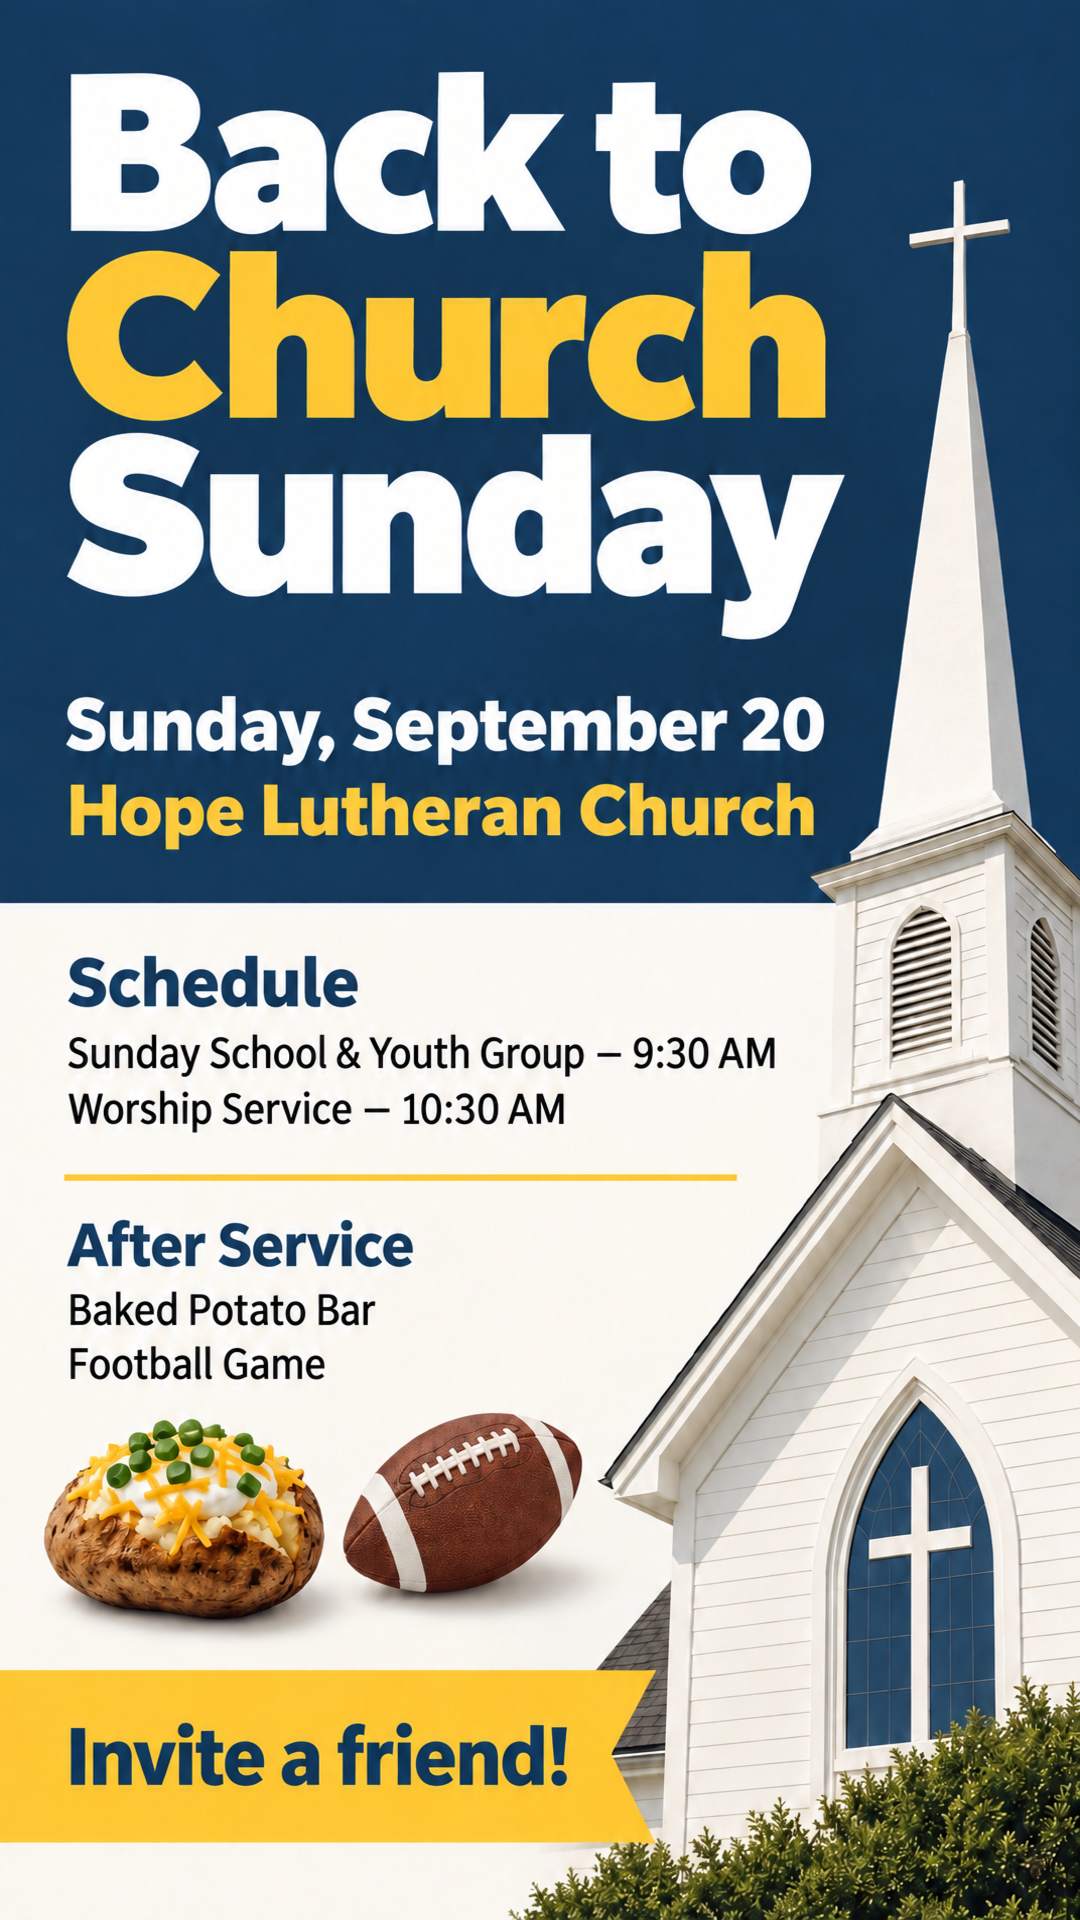 |
The AI regenerates the flyer and keeps the rest of the design as close as it can. It's a new image, not a pixel-perfect patch, so read the whole flyer again afterward.
For anything that has to be exact, use the built-in editor: add a real QR code, drop in your original logo file, or add a new line of text on top of the design. You can also adjust brightness, contrast and saturation there.
Finally, test it the way people will see it. Scan the QR code with your phone, look at the social version on a phone screen, and print one copy of the print version.
Common Mistakes to Avoid
| Mistake | What to do instead |
|---|---|
| Putting everything on the flyer | One message, one action. Move extra details to a website or QR code. |
| The generic AI look: dark background, glowing text, sparkles, rows of icons and check marks | Name a real style ("1970s screen print", "hand-painted shop sign"), two or three colors and plenty of white space. Use a real photo of your business. Say what to avoid: "no glow, no sparkles". |
| Rewriting the whole prompt to fix one detail | Use a one-sentence edit and add "Keep everything else the same." |
| Trusting the text because the headline looks right | Check every date, time, number and name. |
That's the whole process: plan the message, describe it clearly, pick the right size, compare a few versions and check the details. The generating takes about a minute. The few minutes around it are what make the flyer work.
Making a flyer for a specific occasion? Our party flyer maker and church flyer maker pages have examples and prompts you can start from.
FAQ
Can I make a flyer with AI for free?
You can start for free. New AI Flyer Studio accounts get enough free credits for one flyer, and flyers made with free credits include a watermark. Paid plans and credit packs remove the watermark, and each flyer costs 2 credits. When you compare other tools, check whether "free" includes downloading without a watermark, not just generating.
Can ChatGPT make a flyer?
Yes. ChatGPT and other general AI image tools can create flyer-style images, and they're flexible. The difference is setup: you choose the shape, handle print size and bleed yourself, and write prompts without flyer-specific help. A dedicated flyer generator gives you social and print sizes up front and organizes your event details into a flyer layout.
Can I print an AI-generated flyer?
Yes, as long as you create it at print size from the start. AI Flyer Studio's print sizes are 300 DPI with bleed included. Flyers download as PNG files, which most print shops accept. If your printer asks for a PDF, convert the PNG with your computer's print-to-PDF option or any free converter. Print a test copy before ordering a large run.
How do I fix a typo on an AI flyer?
AI flyers are flat images, so you can't click on a word and retype it. Instead, use the flyer as a reference image and describe the fix in one sentence, such as "Change the phone number to 555-0182. Keep everything else the same." Then proofread the new version, because the whole image is regenerated.
Can I add my logo or a QR code?
Yes. Upload your logo as a reference image and say where it should go. If the logo has to be exact, add the original file on top in the editor after generating. Add QR codes the same way, because QR codes drawn by AI usually don't scan.
How long does it take to make a flyer with AI?
Generating takes about a minute. Plan on 10 to 15 minutes in total, including writing your brief, comparing versions and proofreading.
Can I make a flyer in another language?
Yes. Write your prompt in the language you want on the flyer, and the text will come out in that language. Languages that use the Latin alphabet, like Spanish, French and Portuguese, are the most reliable.